React Native 애플로 로그인 구현하기
지난해 애플 또한 애플로 로그인 하기 서비스를 시작했는데, 주목할 점은 기존 앱스토어 심사지침 상 서비스 자체 로그인 없이 소셜로그인 만으로 계정 승인이 이루어진 경우 반려 사유가 되었지만, 애플 로그인을 병행하는 경우 서드파티 로그인 만으로도 서비스가 가능하다는 점이다. [참고: App Store 심사 지침]
이번 포스팅 에서는 리액트 네이티브에서 애플로 로그인을 구현해 보려고 한다.
Apple Developer 대시보드 설정
먼저, 애플로 로그인 하기를 구현하기 위해서는 애플 개발자 계정에서 프로젝트의 Identifier와 Key를 발급 받아야 한다.
애플 개발자 사이트에 로그인 한 후 Account > Certificates, IDs & Profiles 메뉴로 접속해 Identifiers의 + 추가 버튼을 누른다.

아래 그림과 같이 App IDs를 체크하고 다음 단계로 이동한다.

Description과 프로젝트 번들ID를 입력한 후 아래 Capabilities에서 Sign In with Apple을 선택한 후 우측에 Enable as a primary App ID를 확인한 후 다음 단계로 이동해 앱을 등록한다.

등록이 성공적으로 이루어 졌는지는 Identifiers 메뉴 리스트에서 확인할 수 있다. 성공적으로 등록이 완료 되었으면 Keys 메뉴로 이동해 새로운 키를 등록할 차례이다.

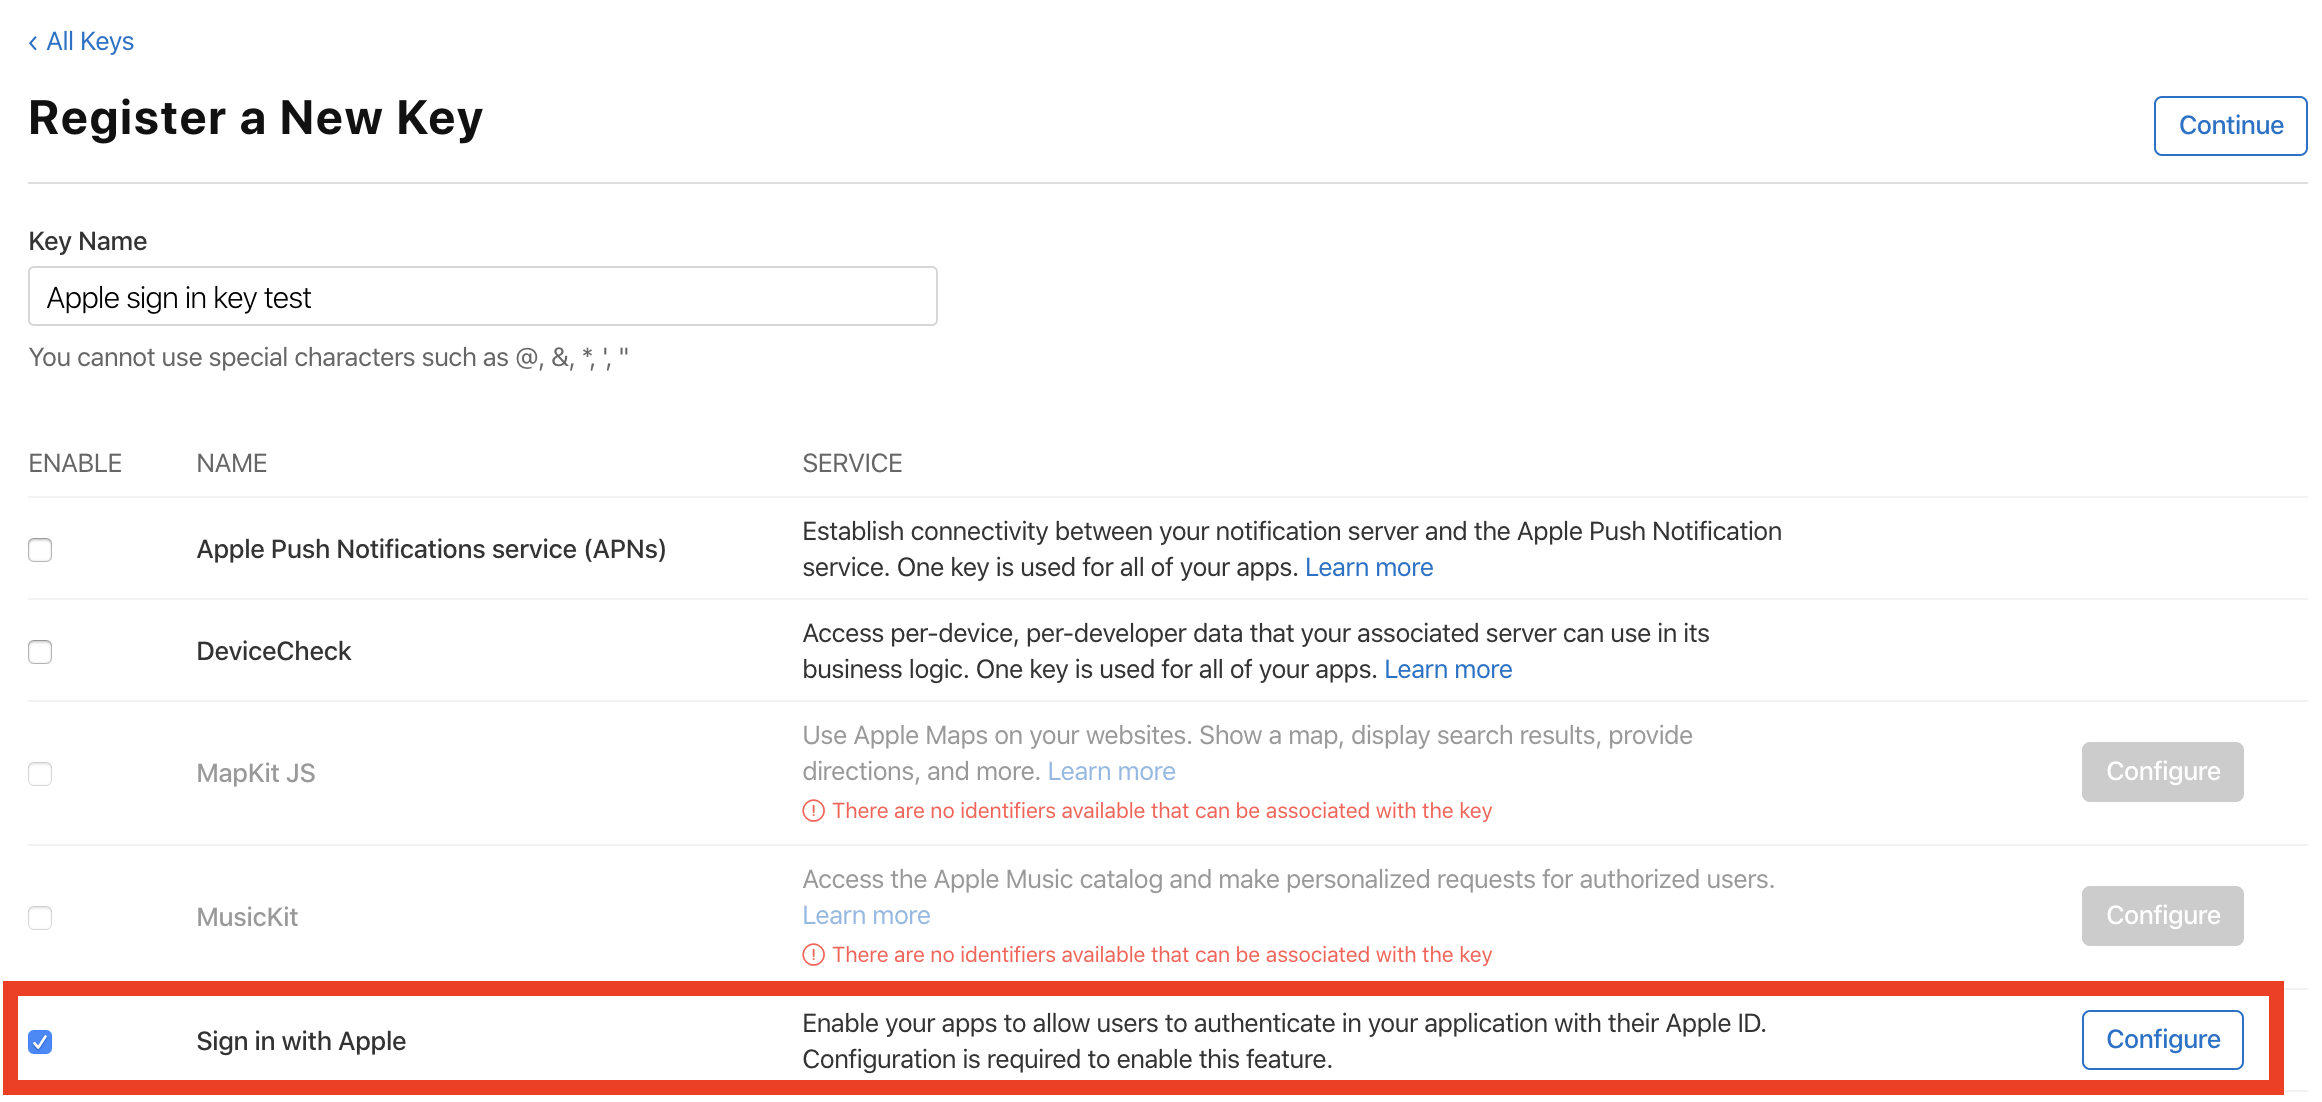
적절한 키 이름을 입력하고, Sign in with Apple을 선택한 뒤 Configure 버튼을 눌러 다음 단계로 이동한다.

Primary App ID로 좀 전에 생성했던 앱 아이디를 선택한 뒤 저장하고 등록한다.

등록 후 다운로드 까지 완료하면 Apple Developer 계정에서의 설정은 끝!!

프로젝트 설정
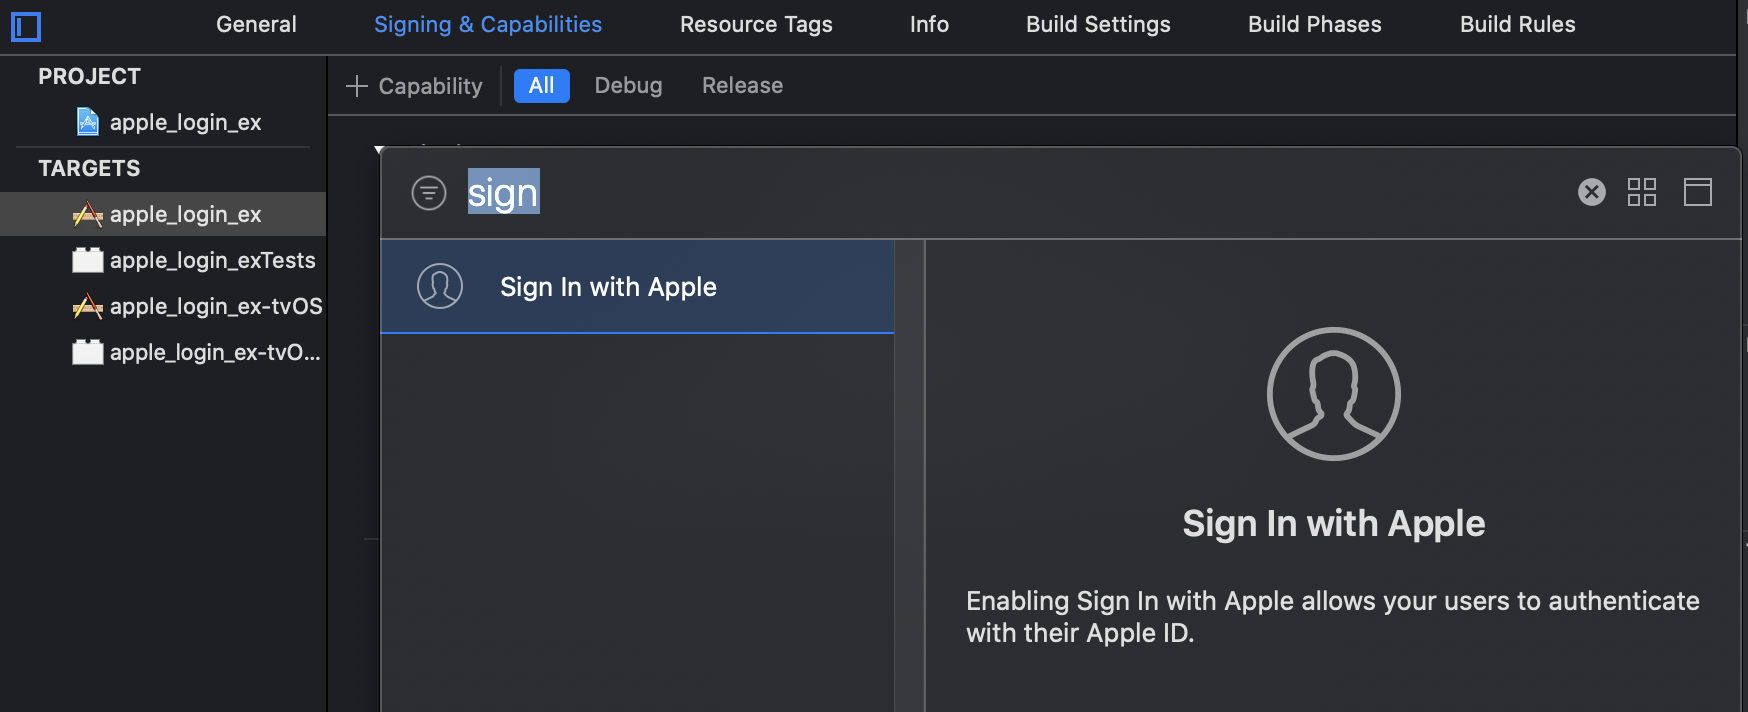
Xcode에서 프로젝트 .xcworkspace를 열고, 프로젝트를 선택, Signing and Capabilities 메뉴로 이동한다.
먼저, Signing 섹션에서 방금 Key를 발급받은 애플 계정의 Team울 선택하고, +Capability에서 Sign In With Apple을 추가한다.


모듈을 이용한 애플로 로그인 구현
1. 모듈 설치
@invertase/react-native-apple-authentication 모듈을 설치한다.
yarn add @invertase/react-native-apple-authentication
cd ios && pod install && cd ..
2. 버튼 UI 생성
@invertase/react-native-apple-authentication 에서 제공하는 AppleButton API를 통해 UI를 쉽게 생성할 수 있다.
import React from 'react';
import {SafeAreaView, StyleSheet} from 'react-native';
import {
  AppleButton,
  AppleAuthRequestOperation,
  AppleAuthRequestScope,
  AppleAuthCredentialState,
} from '@invertase/react-native-apple-authentication';

const App = () => {
  const onAppleButtonPress = () => {};
  return (
    <SafeAreaView style={styles.container}>
      <AppleButton
        buttonStyle={AppleButton.Style.BLACK}
        buttonType={AppleButton.Type.SIGN_IN}
        style={styles.appleButton}
        onPress={() => onAppleButtonPress()}
      />
    </SafeAreaView>
  );
};

const styles = StyleSheet.create({
  container: {
    flex: 1,
    justifyContent: 'center',
    alignItems: 'center',
  },
  appleButton: {width: '70%', height: 45},
});

export default App;
3. 로그인 프로세스 정의
performRequest 메소드의 requestedOperation를 통해 로그인, 로그아웃 등을 진행할 수 있으며, requestedScopes로 유저 정보를 요청할 수 있다.
그리고 getCredentialStateForUser메소드를 통해 현재 승인 상태를 확인할 수 있다.
import appleAuth, {
  AppleButton,
  AppleAuthRequestOperation,
  AppleAuthRequestScope,
  AppleAuthCredentialState,
  AppleAuthError,
} from '@invertase/react-native-apple-authentication';

  ...
  const onAppleButtonPress = async () => {
    try {
      const responseObject = await appleAuth.performRequest({
        requestedOperation: AppleAuthRequestOperation.LOGIN,
        requestedScopes: [AppleAuthRequestScope.EMAIL],
      });
      console.log('responseObject:::', responseObject);
      const credentialState = await appleAuth.getCredentialStateForUser(
        responseObject.user,
      );
      if (credentialState === AppleAuthCredentialState.AUTHORIZED) {
        console.log('user is authenticated');
      }
    } catch (error) {
      console.log(error);
      if (error.code === AppleAuthError.CANCELED) {
        console.log('canceled');
      } else {
        console.log('error');
      }
    }
  };
  ...
appleAuth.performRequest를 통해 identityToken, authorizationCode, email, fullName, user 정보 등을 얻을 수 있다.
👩🏻💻 배우는 것을 즐기는 프론트엔드 개발자 입니다
부족한 블로그에 방문해 주셔서 감사합니다 🙇🏻♀️
in the process of becoming the best version of myself