React Native Firebase 환경설정하기
앱을 사용하는 사용자의 행동 분석이나 푸시알림 등의 서비스를 사용하기 위해서 React-Native-Firebase 모듈을 사용하여 React Native 앱에 Firebase 서비스를 연결해 사용중이다. 개발을 하다보니 테스트 과정에서의 트래픽이 실제 서비스 통계에 영향을 미칠 수 있기 때문에 dev와 prod 환경에 따른 Firebase 프로젝트도 각각 구성해야할 필요성을 느끼게 되어 그 방법을 알아보았다.
Firebase 프로젝트 생성
먼저, Firebase 프로젝트를 생성하는데, dev와 prod 환경에서 사용할 프로젝트를 각각 생성하고,
각 프로잭트 내 ios, android 앱도 생성한다.
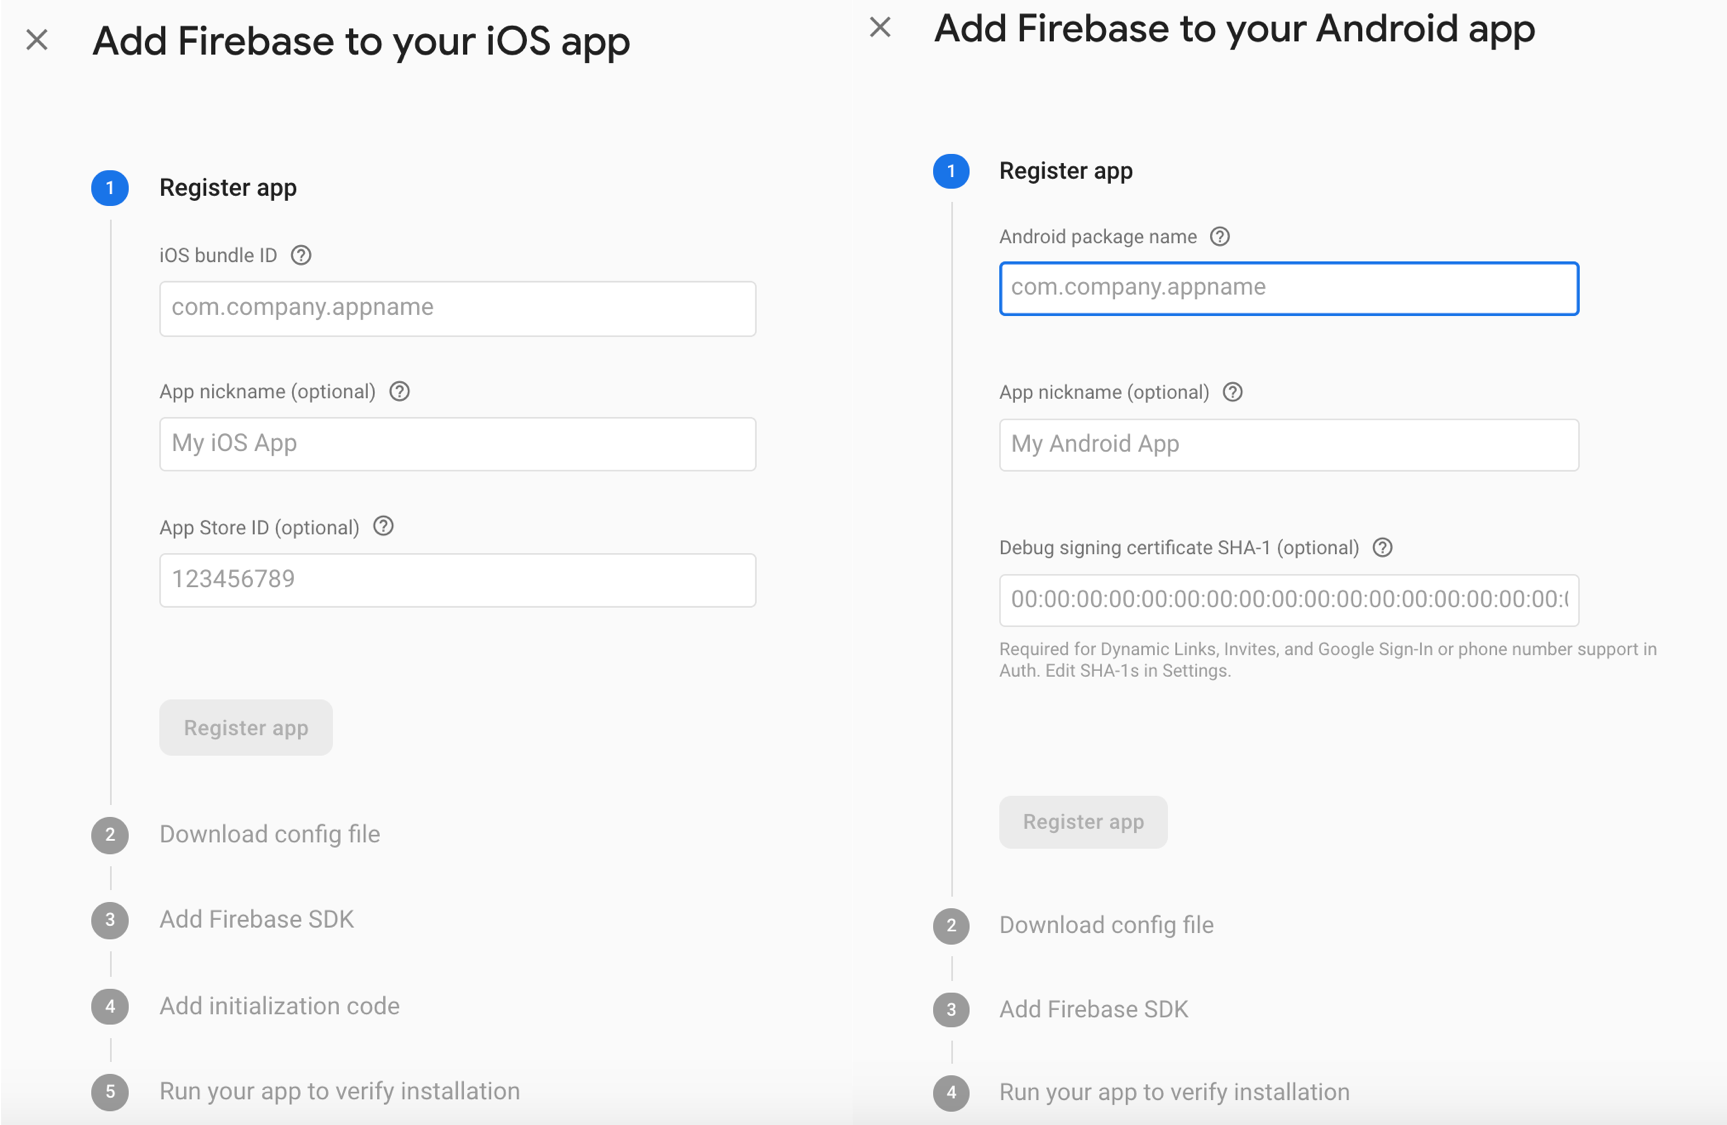
Firebase의 앱생성 안내에 따라 sdk 설정을 진행하되, Step 2에서 다운받은 google-service.jon / GoogleService-info.plist 파일은 프로젝트 폴더에 추가하지 않고 따로 저장해 둔다.
ios 구현
- rootDir/ios/ 폴더 내에 아래와 같이 Dev/Prod 각각에 맞는 GoogleService-info.plist 파일이 있는 Firebase 폴더 생성한다.

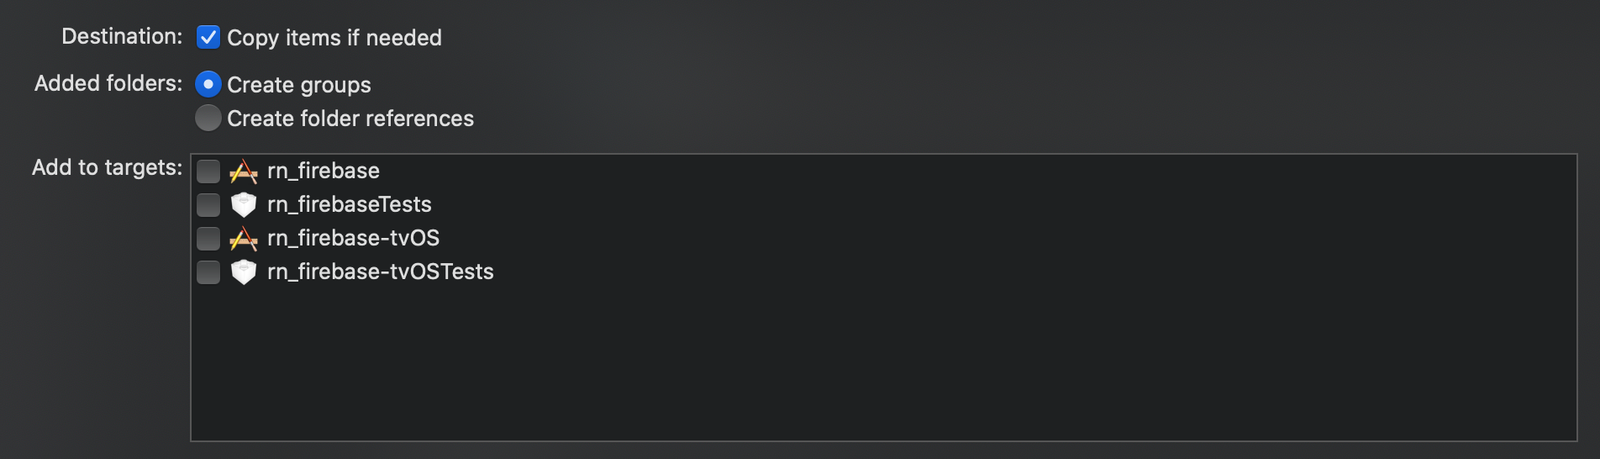
- Xcode 프로젝트를 열고, root 폴더에 방금 생성한 Firebase 폴더를 추가하는데, 이 때 아래와 같이 target을 지정하지도, reference를 생성하지도 않는다.
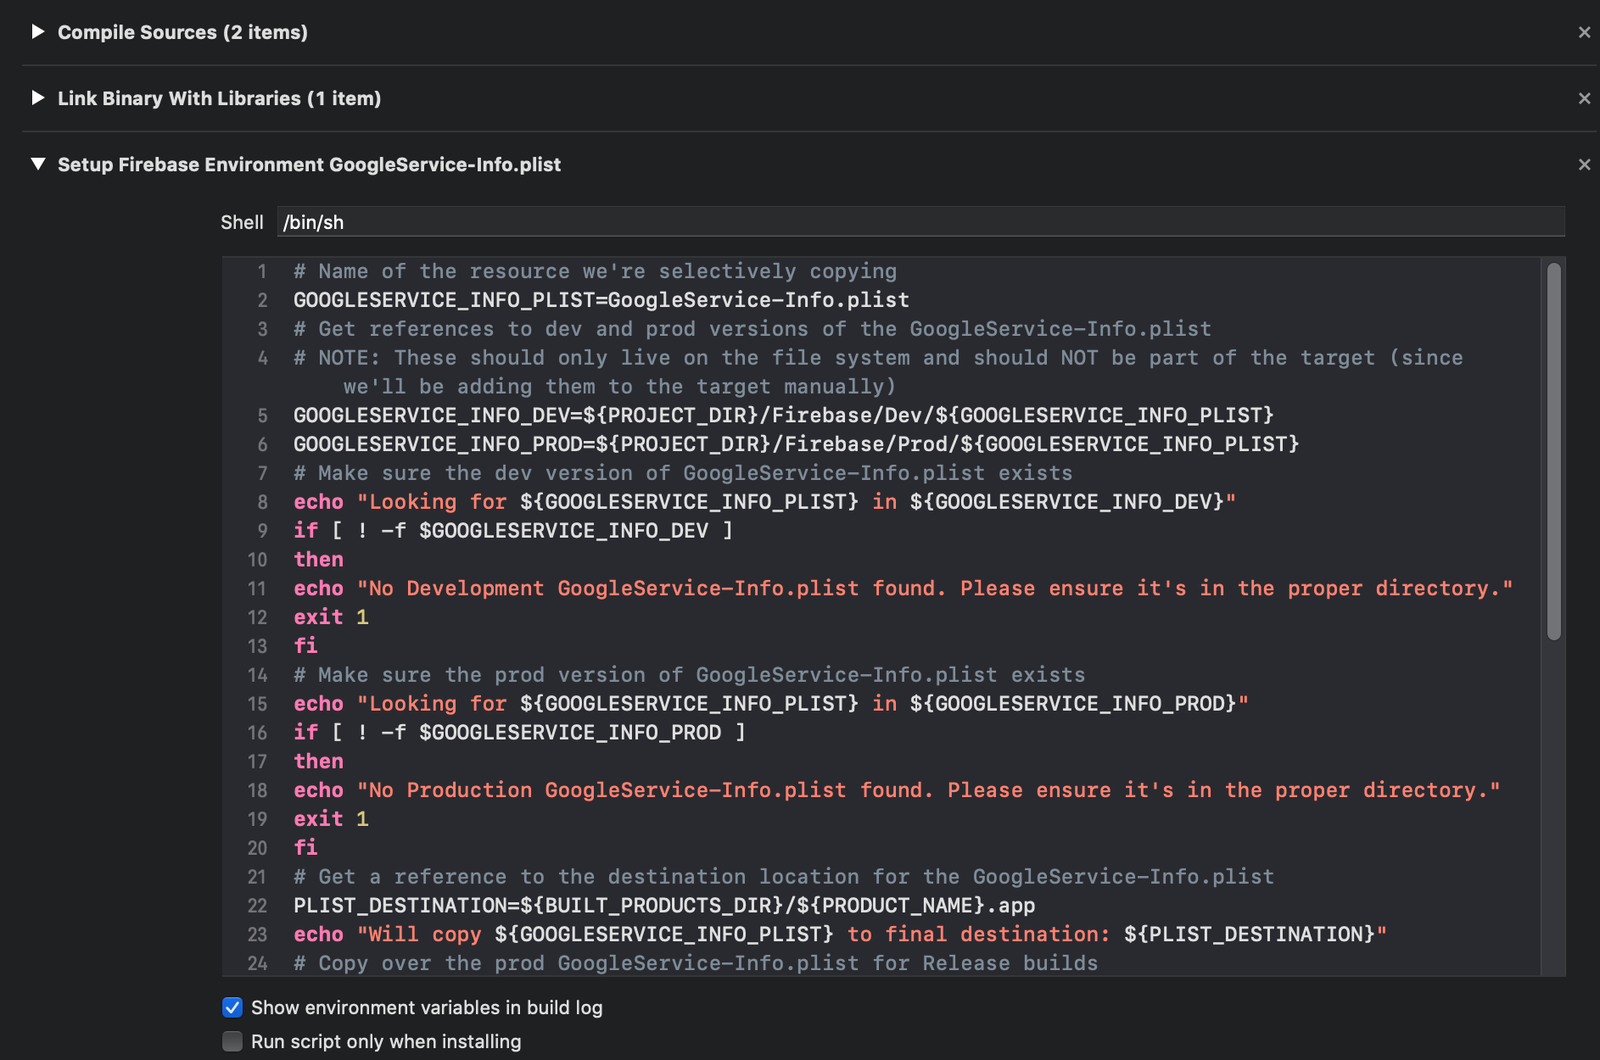
- 앱 타겟의 Build Phase에 New Run Script Phase를 추가하고,

이름을 “Setup Firebase Environment GoogleService-Info.plist”로 수정하고 아래 코드를 추가해 준다.
# Name of the resource we're selectively copying
GOOGLESERVICE_INFO_PLIST=GoogleService-Info.plist
# Get references to dev and prod versions of the GoogleService-Info.plist
# NOTE: These should only live on the file system and should NOT be part of the target (since we'll be adding them to the target manually)
GOOGLESERVICE_INFO_DEV=${PROJECT_DIR}/Firebase/Dev/${GOOGLESERVICE_INFO_PLIST}
GOOGLESERVICE_INFO_PROD=${PROJECT_DIR}/Firebase/Prod/${GOOGLESERVICE_INFO_PLIST}
# Make sure the dev version of GoogleService-Info.plist exists
echo "Looking for ${GOOGLESERVICE_INFO_PLIST} in ${GOOGLESERVICE_INFO_DEV}"
if [ ! -f $GOOGLESERVICE_INFO_DEV ]
then
echo "No Development GoogleService-Info.plist found. Please ensure it's in the proper directory."
exit 1
fi
# Make sure the prod version of GoogleService-Info.plist exists
echo "Looking for ${GOOGLESERVICE_INFO_PLIST} in ${GOOGLESERVICE_INFO_PROD}"
if [ ! -f $GOOGLESERVICE_INFO_PROD ]
then
echo "No Production GoogleService-Info.plist found. Please ensure it's in the proper directory."
exit 1
fi
# Get a reference to the destination location for the GoogleService-Info.plist
PLIST_DESTINATION=${BUILT_PRODUCTS_DIR}/${PRODUCT_NAME}.app
echo "Will copy ${GOOGLESERVICE_INFO_PLIST} to final destination: ${PLIST_DESTINATION}"
# Copy over the prod GoogleService-Info.plist for Release builds
if [ "${CONFIGURATION}" == "Release" ]
then
echo "Using ${GOOGLESERVICE_INFO_PROD}"
cp "${GOOGLESERVICE_INFO_PROD}" "${PLIST_DESTINATION}"
else
echo "Using ${GOOGLESERVICE_INFO_DEV}"
cp "${GOOGLESERVICE_INFO_DEV}" "${PLIST_DESTINATION}"
fi
그리고 방금 설정해준 “Setup Firebase Environment GoogleService-Info.plist” 스크립트가 “Link Binary With Libraries” 다음에 위치할 수 있도록 이동해 준다.
여기까지 하면 빋드 타입(debug/release)에 따라 알맞은 GoogleService-info.plist로 빌드된다.
android 구현
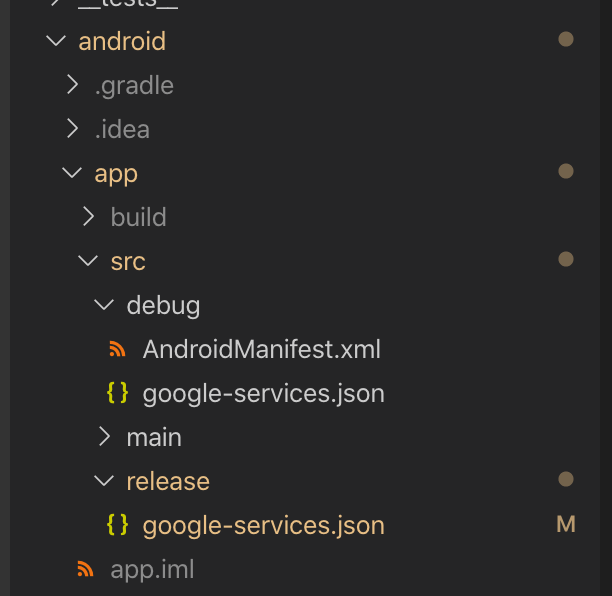
android는 훨씬 간단한데, android/app/src/ 폴더 내에 debug와 release 폴더를 생성하고 각각 알맞은 google-services.json 파일을 넣어주면 debug/release 버전으로 각각 빌드될 때 해당 폴더의 파일을 가져다 쓴다.
👩🏻💻 배우는 것을 즐기는 프론트엔드 개발자 입니다
부족한 블로그에 방문해 주셔서 감사합니다 🙇🏻♀️
in the process of becoming the best version of myself